© Filmakademie Baden-Württemberg
Introduction
In the following, I’ll share a small breakdown of how I tackled a big fluid simulation in blender. The focus is on the technical side: file structuring, Blender linking, and multi-machine rendering.
I used Blender for rendering, the FLIP Fluids addon for the simulation, and Nuke for compositing.
While I considered Houdini, I lacked experience with it and didn’t have a full license, so I chose the safer route.
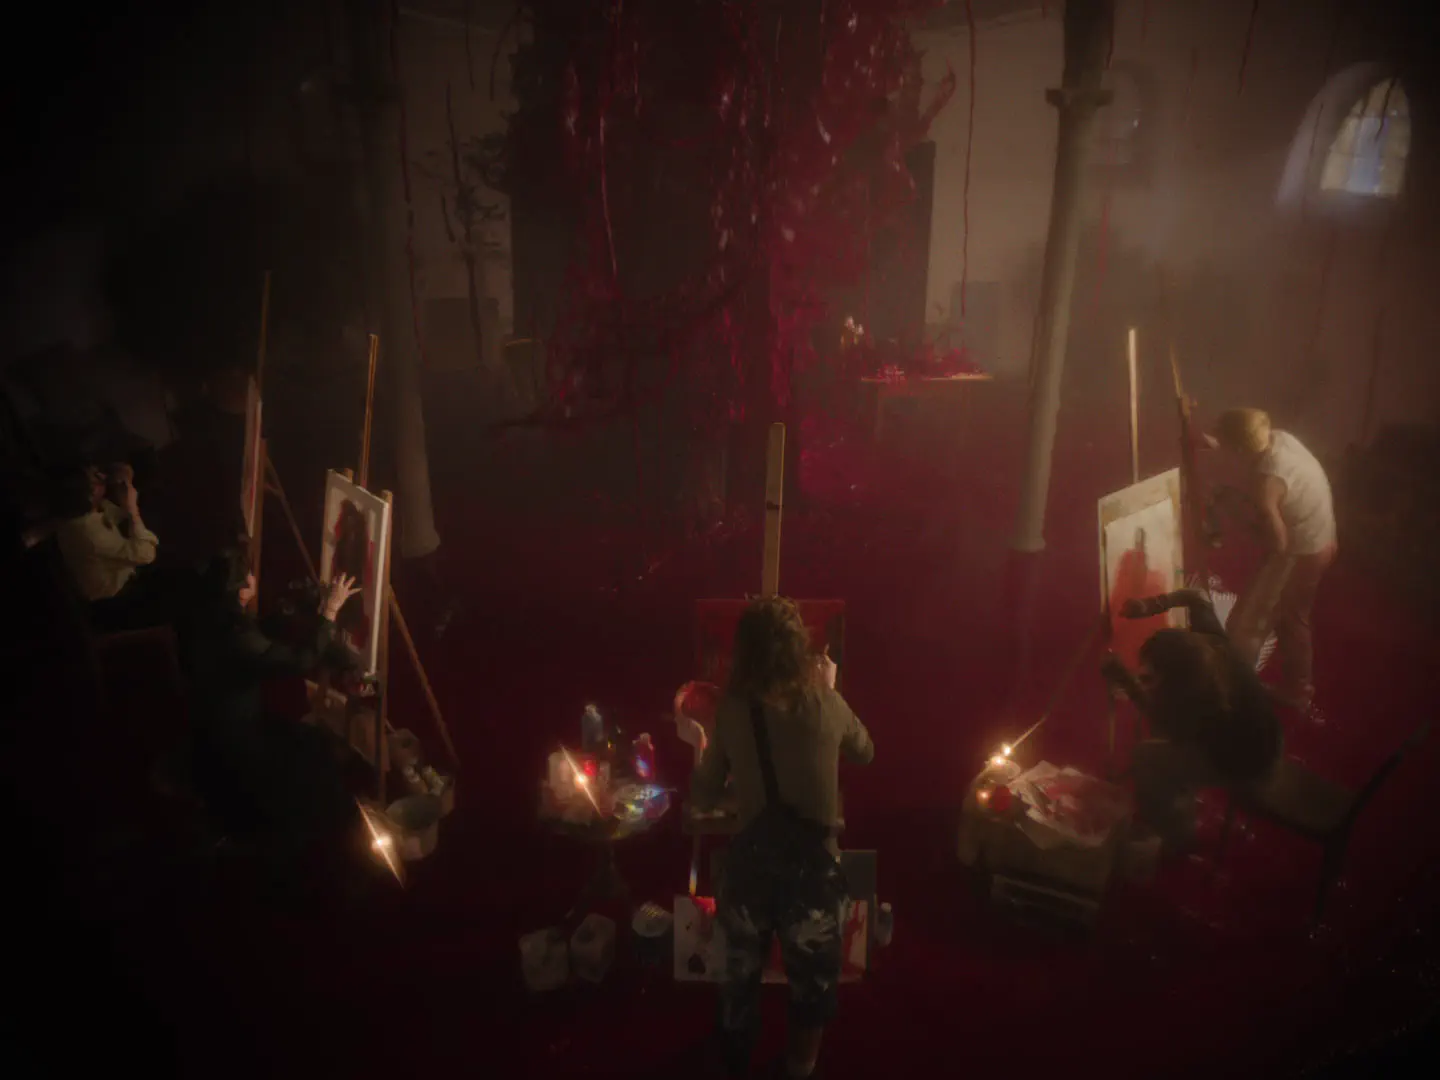
Shot Breakdown
© Filmakademie Baden-Württemberg
My Tasks:
[1] 3D reconstruction
[2] Blood sim
[3] Comp
Pipeline
Splitting the Project File
Initially, I kept everything: modeling, simulation, and rendering in a single .blend file. This quickly made Blender painfully slow, especially during modeling.
To fix this, I split the project into separate files and linked them together.
I settled on three files:
modelling.blendsimulation.blendrendering.blend
This structure improved performance and allowed each stage to be versioned independently, avoiding unnecessary file bloat.
Takeaway: Splitting project files isn’t just for teams. For complex solo projects, it can significantly improve workflow efficiency.
Easy File Versioning
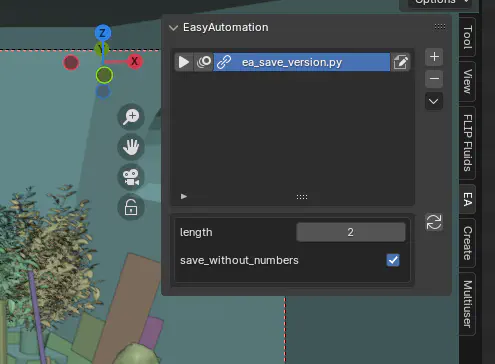
I used a small versioning script that saves a copy of the current file with an incremented version number in the working directory. It also creates another copy without numbers one folder up to serve as the published file.
Here’s the source.
To make this easier, I used one of my own addon, EasyAutomation, to expose the script inside the 3D Viewport.
Example folder structure:
sh01
└── modelling
    ├── sh01_mod.blend
    └── work
        ├── sh01_mod_02.blend
        └── sh01_mod_01.blend
The published file was auto updated, cause its name was consistent.
Robust Linking
After splitting the files, the next challenge was managing how they linked together.
Initially, I linked the full scene collection from the modeling file into both the rendering and simulation files. But I soon realized I needed different versions of the scene:
– one for collisions
– one for beauty rendering
– one for indirect lighting
To address this, I began organizing the scene into separate collections and linking only what each file needed.
This worked, but wasn’t robust. Renaming collections or changing structure in the modeling file meant I had to update links manually in every downstream file.
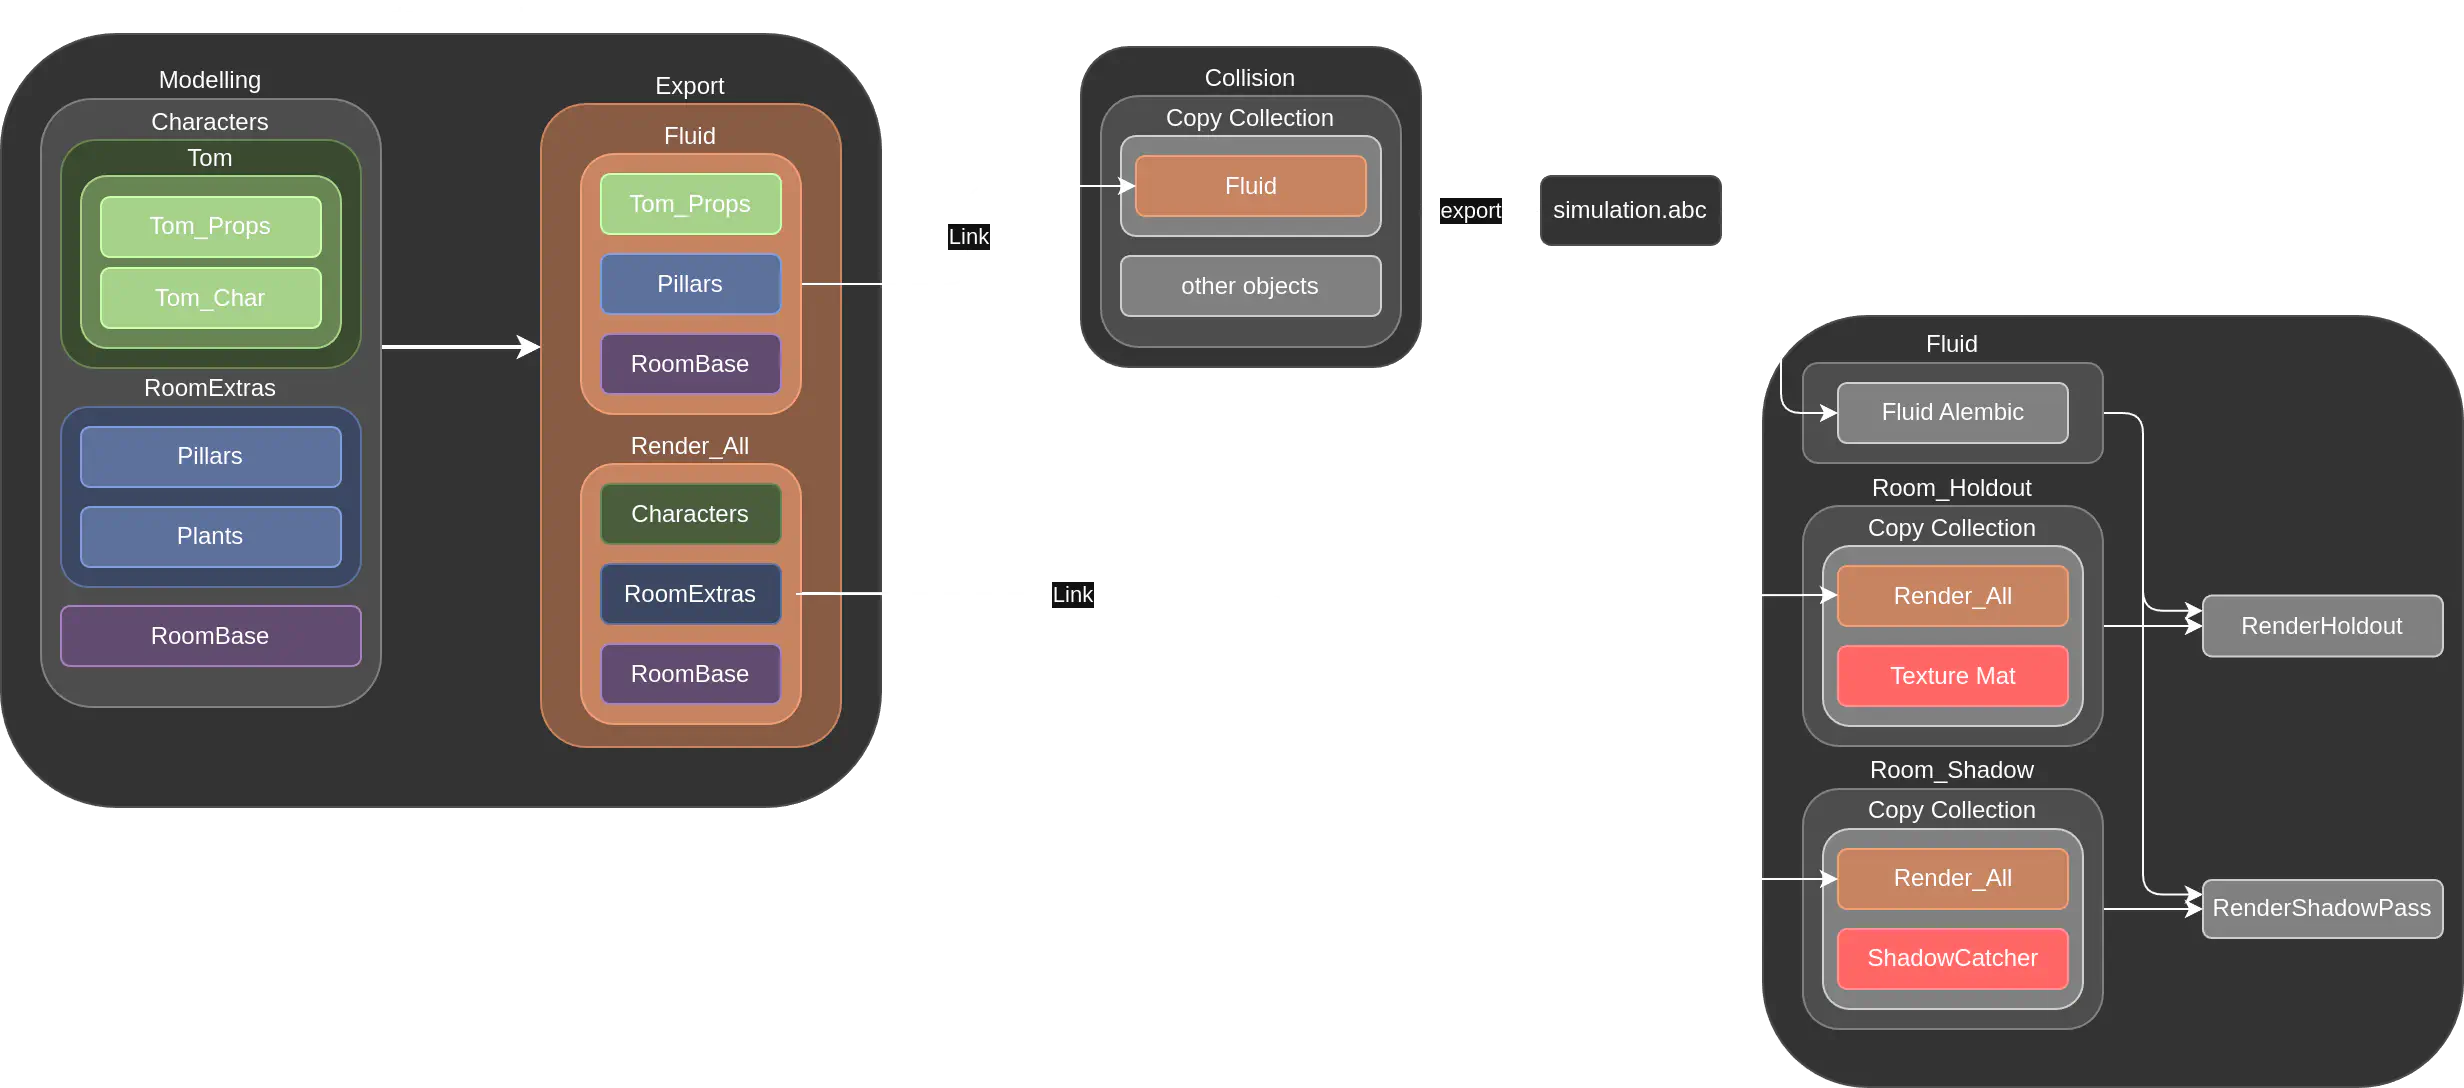
Collection linking and structure between the different files
So I restructured the modeling file to prepare the needed collections in advance. This made everything more maintainable.
To solve these issues, I restructured the workflow so that the modeling file itself defines and prepares the collections used by the fluid and rendering files. This new approach brings several improvements:
Benefits of this approach:
-
Simplified updates
New objects only needed to be instanced into the appropriate export collection - everything else updated automatically. Since all changes happen within the modeling file, there’s no risk of breaking links in downstream files. -
Hierarchical control
In the Render_All collection, I instance the high level collections. For the Fluid collection, I skip Tom_Char and only instance Tom_Props. This gives me fine control where needed and makes the rest simple. -
Flexible material overrides
In the rendering file, I used a Geometry Nodes modifier to apply different materials to the linked collections, perfect for using different materials in different render passes.
Problems with the Simulation
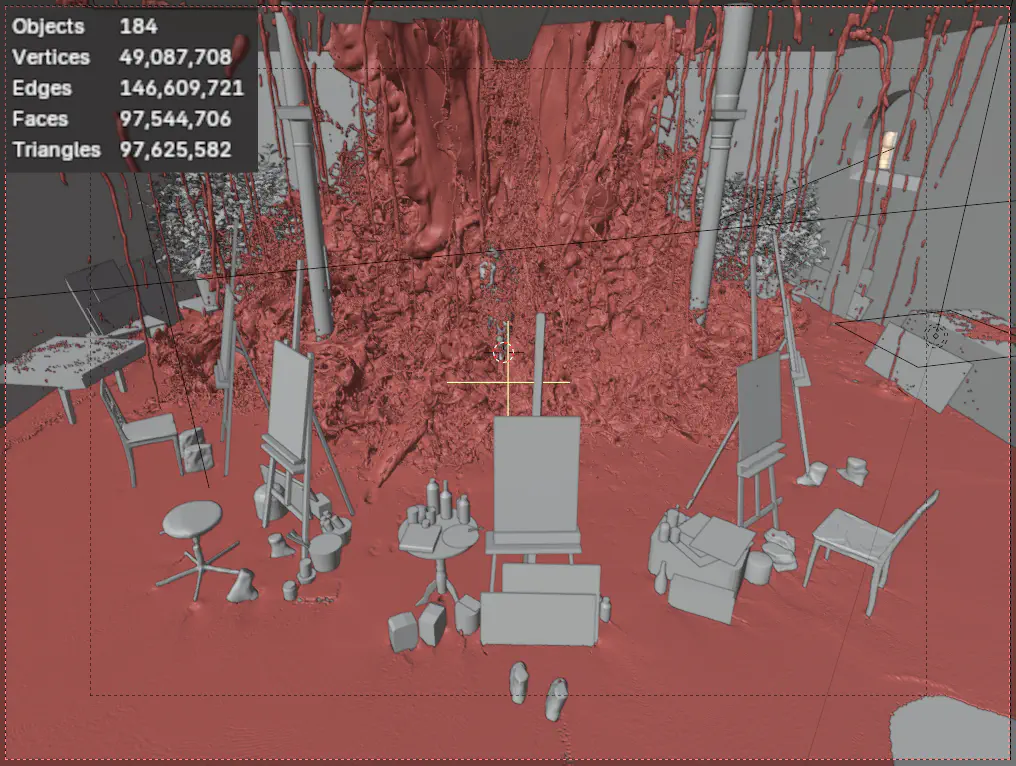
Scene in the viewport
Once the project was split into three files, I had to figure out how to bring the simulation into the rendering.blend.
I first tried linking the fluid domain from the simulation file, but FLIP Fluids doesn’t support this.
I also tried linking just the cache on a new object, but that didn’t work either.
Solution:
Exporting the sim as an Alembic sequence.
Downside:
This doubled the storage needs, since I had to keep both the FLIP Fluids cache and the Alembic files.
- Final FLIP Fluids cache size: 178 GB
- Final Alembic .abc export: 196 GB
Fun Fact: Blender’s viewport crashes above 80 million polygons. I could only preview one third of the sim - everything else had to be rendered in Cycles to preview.
Hardware & Performance
At first, I only had access to my personal PC:
- Intel i7 8700K
- GTX 1080
- 64 GB RAM
This setup wasn’t sufficient for simulating and rendering simultaneously.
Later, a producer lent me a slightly slower PC. It allowed me to bake one sim while rendering another greatly improving efficiency.
In the final phase, I gained access to a university workstation:
- AMD Threadripper
- 128 GB RAM
- Nvidia A6400
This upgrade allowed me to push voxel resolution to 1024 and dramatically cut render and sim times.
- Simulation time: 5 days
- Rendering time: 4 hours across 6 uni PCs
I completely underestimated how much time and hardware needed for large-scale simulations. Access to more machines was essential to finish the project.
Multi-PC Workflow
With more PCs available, I had to figure out how to keep everything in sync and render in parallel. That breaks down into two parts: file synchronization and render management.
File Synchronization
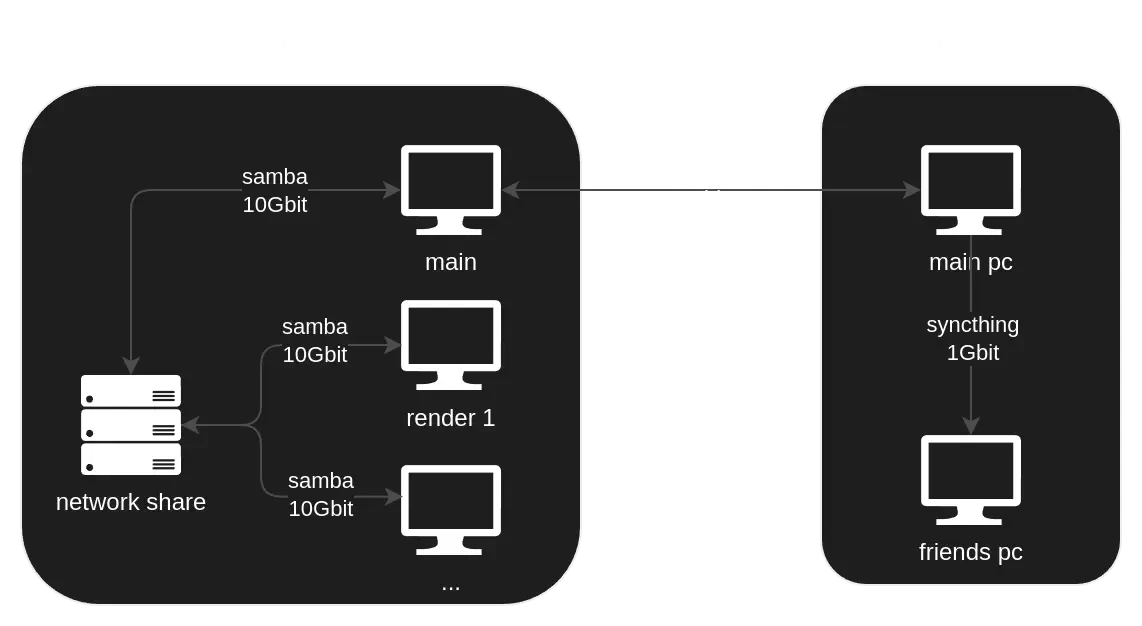
networking between the pcs
Keeping project files in sync across machines was critical.
I used Syncthing to sync folders, which worked well—though it took a moment to detect new files.
Thanks to a fast 1 Gbit/s internet connection on both sides, syncing large simulation files between home and university was feasible.
At university, the project had a SMB Network Share giving all the PCs access to the project files.
Distributed Rendering
For rendering on multiple machines, I configured Blender’s output settings like this:
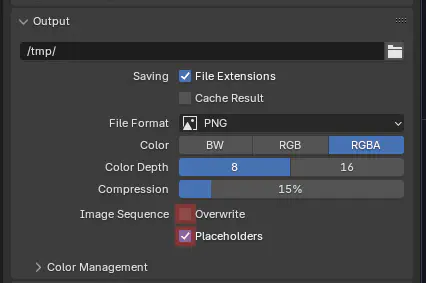
- Unchecked Overwrite to prevent re-rendering frames which are already in queue.
- Enabled Placeholders so Blender marks which frames are being rendered
This simple setup avoided the need for a dedicated render manager.
Problem:
I wasn’t using Blender’s default output options. I was using the File Output compositor node. Unfortunately, it doesn’t support Overwrite and Placeholders.
Workaround:
I added a dummy PNG output using the default output setting. That way, the system still created placeholder files to manage render distribution, while the actual image was stored by the compositor node.
Over the internet
I tested distributed rendering via Syncthing between home and uni.
Sadly, Syncthing didn’t sync placeholder files quickly enough, which led to some frames being rendered more than once.
Conlusion
This project taught me a lot about managing huge setups in Blender. Even though I love Blender and the FLIP Fluids addon, I’ll definitely create the next simulation in Houdini. Its much more flexible and suited for these kind of setups.
I also learned a lot about estimating time on how long it takes to do stuff.
Overall, I had a lot of fun with this project and very happy for the opportunity!